
17 Nov Installing Google Analytics
Installing Google Analytics
Installing Google Analytics on your website
A lot of people find installing Google Analytics (GA) on their websites frustrating, but it is actually not that difficult, it’s important to know what kind of website you have.
Some of the most popular ones are:
-
PHP Websites – eg. WordPress Website (accessible by an admin page like yourwebsite.com/wp-admin or yourwebsite.com/wplogin)
-
ASP.NET Websites – custom built with a custom backend/admin area
-
Static Websites – usually HTML/CSS based can only be modified by FTP1
You should be in a position to know what type of website you have, given it’s popularity with small businesses, we will be demonstrating in detail how to install GA on a WordPress website, but the same principle can be applied to any website.
Visit http://www.google.com/analytics/ and sign up for GA, don’t forget to download the Play Store / IOS App for it too!
When you sign up with GA, you will get something called a Universal Analytics (UA) Tracking Code, based on your website’s unique UA Number (UA-XXXXXXXX-X). GA will inform you that the code has to be installed on “every webpage you wish to track”, the code will resemble this (except for the UA Number):
<script>
(function(i,s,o,g,r,a,m){i[‘GoogleAnalyticsObject’]=r;i[r]=i[r]||function(){
(i[r].q=i[r].q||[]).push(arguments)},i[r].l=1*new Date();a=s.createElement(o),
m=s.getElementsByTagName(o)[0];a.async=1;a.src=g;m.parentNode.insertBefore(a,m)
})(window,document,’script’,’//www.google-analytics.com/analytics.js’,’ga’);
ga(‘create’, ‘UA-XXXXXXXX-X’, ‘auto’);
ga(‘send’, ‘pageview’);
</script>
Think of this code like a signal, it has to appear on every page of your website, otherwise there will be gaps and inconsistencies in the data GA reports. The great thing about a PHP website is how easy it is to make sure this code is on every page. PHP websites are not like static html websites, the website is more like an application that opens a new instance for each user that is using it, this means that when you open a webpage your browser is actually following the PHP code and calling up each file that is scripted in the code, and overwhelmingly, there is a HEADER file which gives the website the same menu/top portion on every page, the best place for your Code.
1FTP – File Transfer Protocol


So knowing what a Header is, we can now to install analytics on a WordPress website in two ways, the first is to use a plugin and the second is to install it manually. The reason most people use a plugin is it makes it VERY easy to install, however sometimes when you install any new plugin it causes a conflict with other plugins that are part of your website’s design, this can have very unpredictable effects ranging from total shutdown of your website to just parts of it, all of this is usually reversible so don’t panic1.
1If this happens to you, then log into your SERVER’s control panel (usually yourwebsite.com/cpanel or yourwebsite.com:XXXX) navigate to file manager, then find a folder called /wp-content/plugins and find the folder with the name of the plugin you most recently installed and is causing the conflict and delete it.
METHOD 1 – PLUGIN
To add a plugin to your WordPress installation:
1 – Log Into your WordPress Administration Panel
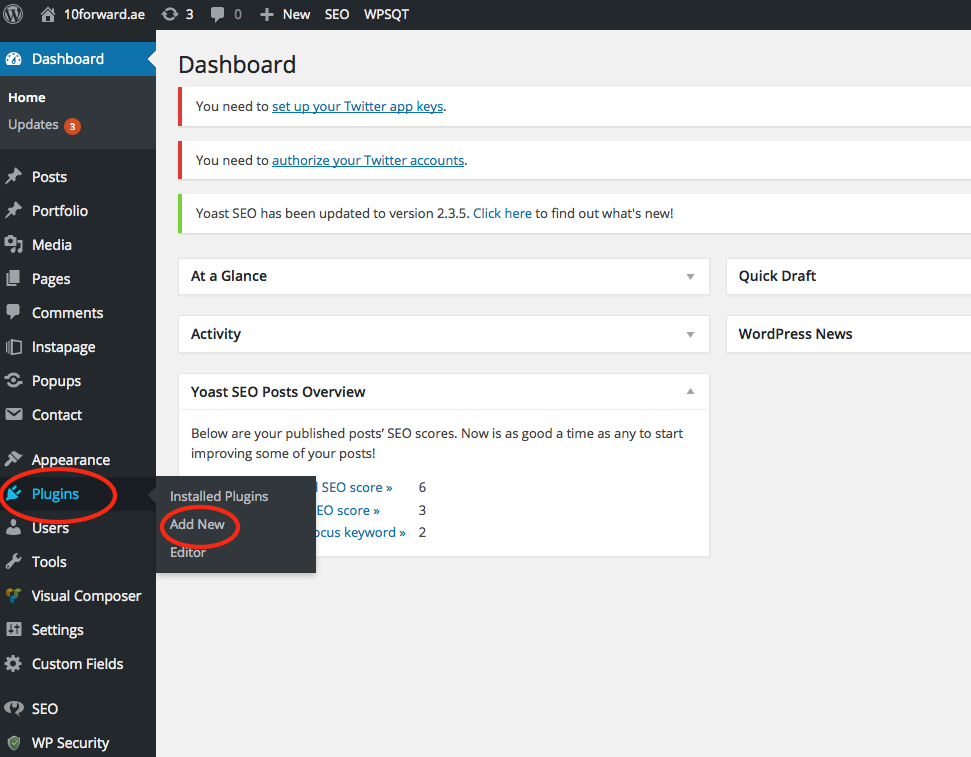
2 – Click on Plugins and Add New
3 – Search for Google Analytics and select a Plugin with the desired features, ensuring that the plugin is compatible, has a good score with many reviews and has been downloaded a LOT.
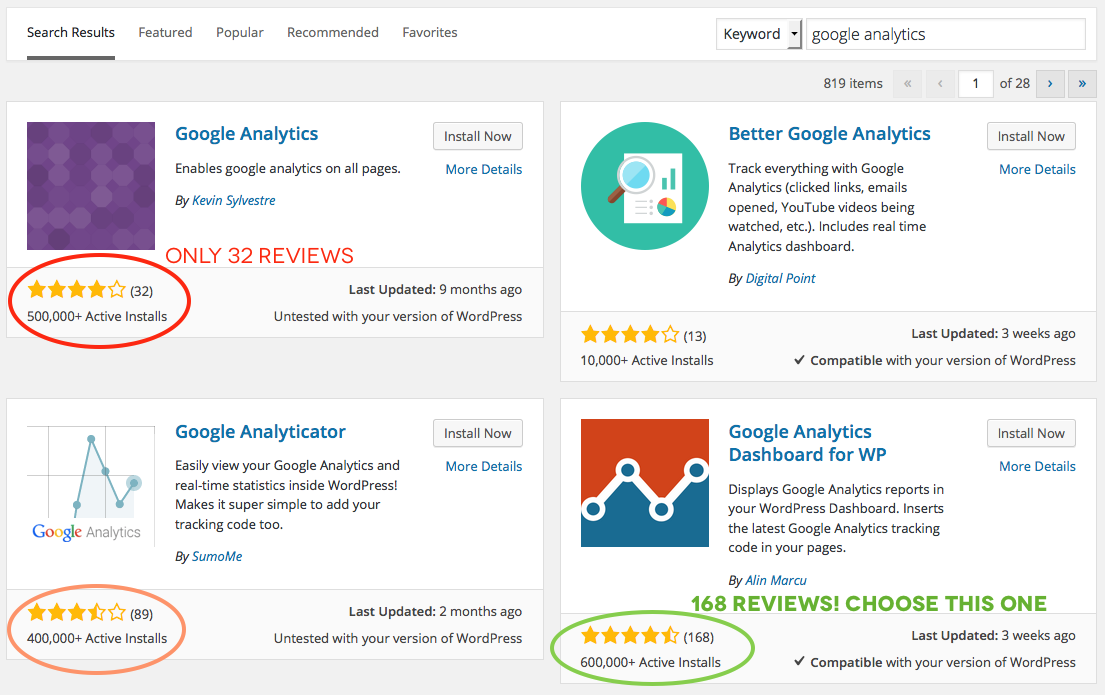
4- Activate Plugin when prompted and click Settings to find where to enter your UA number
METHOD 2 – INSERTING CODE IN HEADER
1 – Log into your WordPress Administration Panel
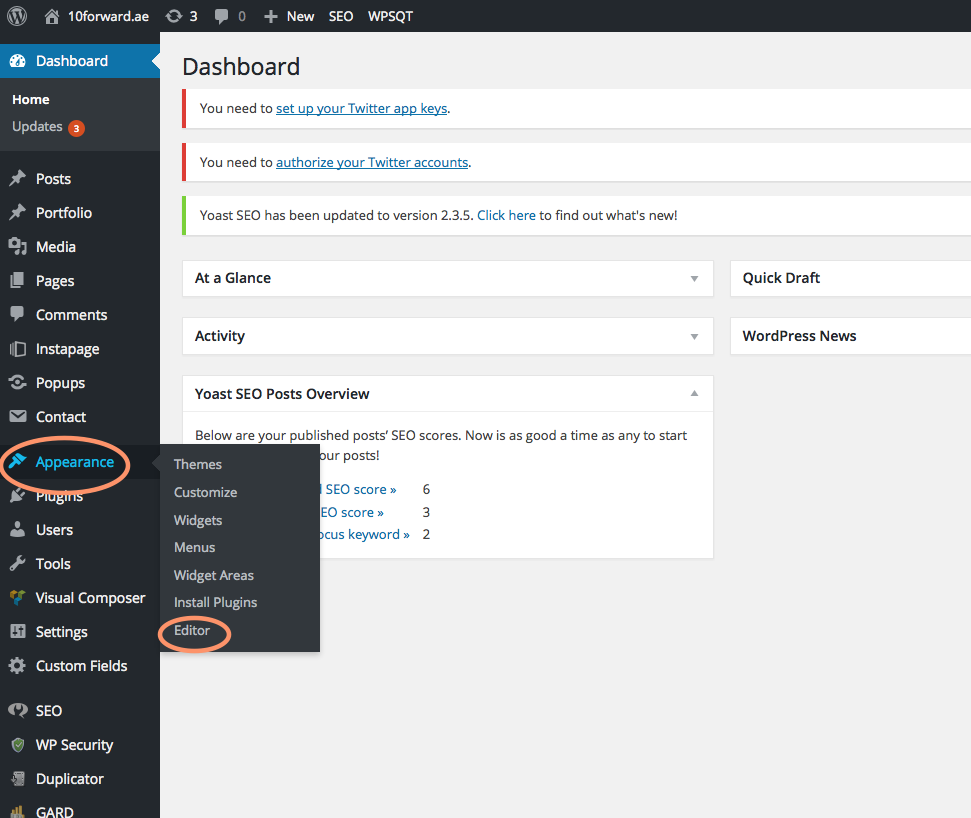
2 – Click Appearances and then Editor

3 – Find your Header.php file, if your design does not have one then find your Footer.php file1
1It’s best practice to make a backup of any file before you make any changes to it, in case you mess around with something and wreck your whole website. To back up the file is very easy, just open the file as in step 4, select all the text (CTRL + A or COMMAND + A on Mac) and Copy then paste into a text file (Notepad or Textedit on Mac) then save it (on your computer) as whatever the file is called. If then you did ruin your website, open the same file in Notepad/Textedit then go to WordPress>Appearance>Editor and replace all ruined file’s contents with the contents of backup file you created.
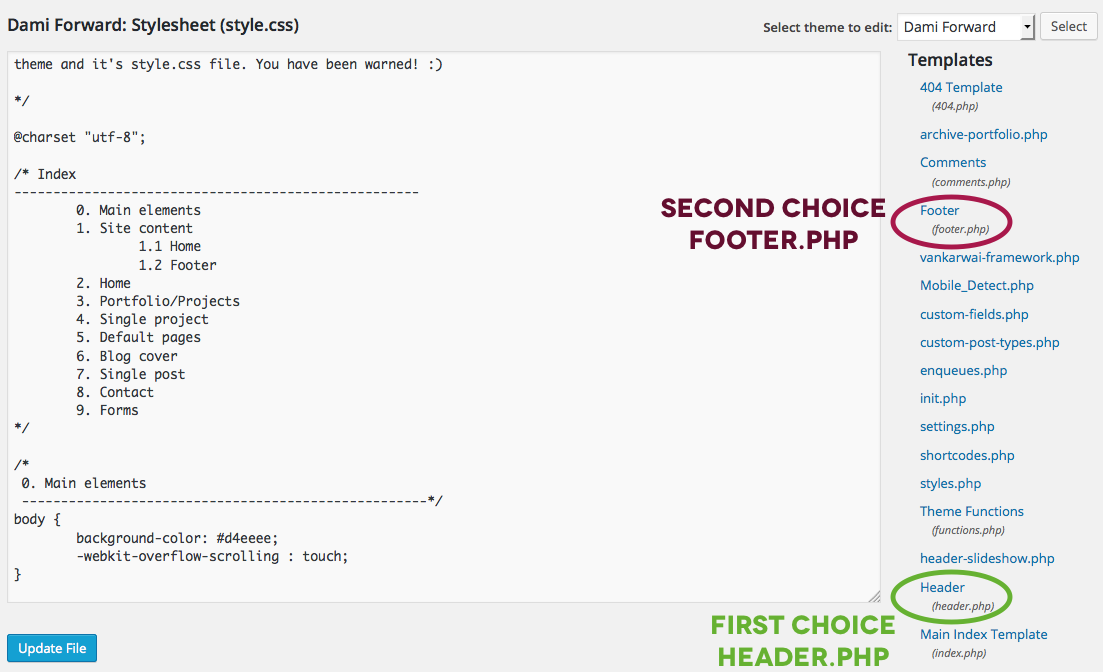
4 – In Header.php find the <HEAD> tag in the code, start a new line immediately underneath and copy/paste the UA Tracking Code from Google Analytics*:
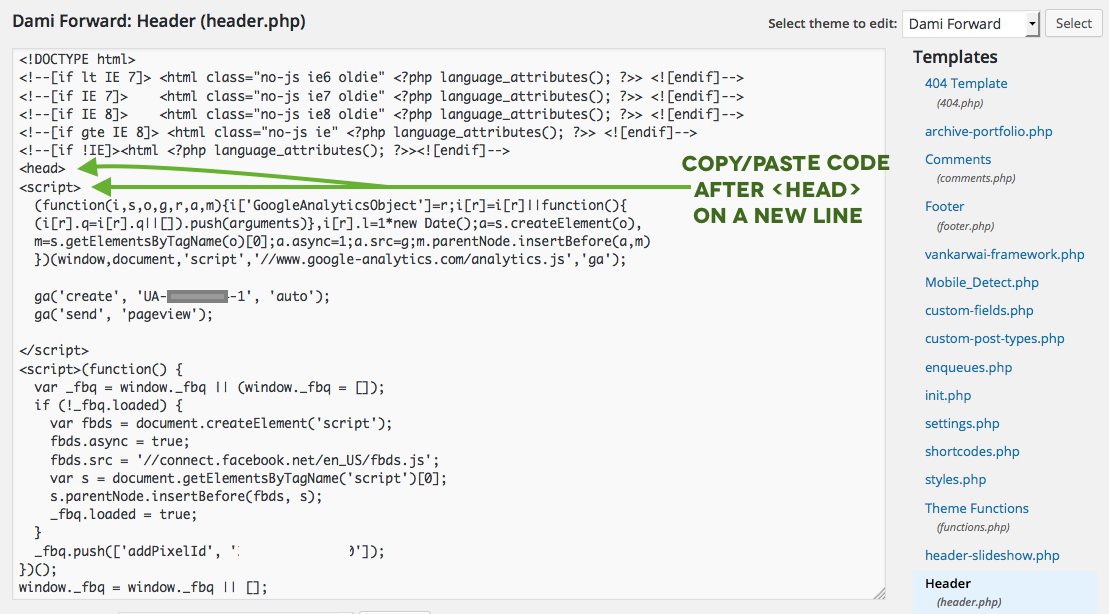
5 – Click Update File
Need help with your social media or digital marketing presence?
We can help with it all!

